How To Keep A Greenhouse Warm In Winter

Greenhouses – whether large or small – are great for protecting plants in the cold winter months. But when things start getting really chilly, you may need to take measures to provide some extra heat – not all of these require electricity, so read on to find out more! Insulating your mini greenhouse is a great idea and will save money.
Insulating Your Greenhouse
First up, it’s worth looking at how to stop heat escaping from your greenhouse, so that you keep heating costs down.
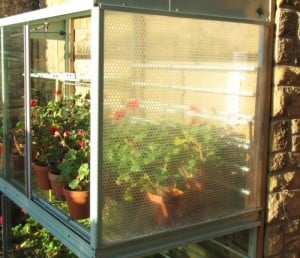
Insulating your greenhouse with bubble wrap is a fantastic method of doing this. Use horticultural bubble wrap (which can be purchased at garden centres), rather than regular packing bubble wrap. This is stronger and designed to withstand UV rays, which will protect your plants. Before applying any insulating layers to the glass, give it a good clean first. This will remove any stains or marks which could prove another barrier to light getting to your plants.
Applying Bubble Wrap To A Mini Greenhouse
One of the pitfalls of insulating your mini greenhouse is that it can reduce the movement of air inside the mini greenhouse, causing damp problems. For this reason, we normally only recommend the insulation of the end glass and the roof. With the front glass left un-insulated, the plants can easily be accessed, the doors can be slid open for ventilation on brighter days, and the clear glass will allow the maximum daylight to enter the greenhouse.
The end glass can be easily insulated by cutting pieces of bubble that are about 1″ (20mm) bigger than the panel of glass. The glass sheet can then be carefully removed, the bubble wrapped around the glass with the bubble on the inside. The glass can then be replaced and any excess bubble trimmed off. Be very careful when removing the glass, as if the corners are damaged, the toughened glass will shatter.

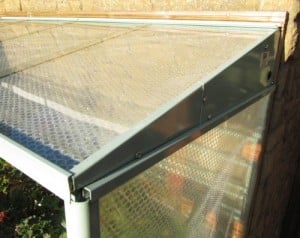
Once the four end sheets are insulated, the top glass can be removed and the bubble placed carefully on the front and back rails before the glass is replaced, trapping the bubble in place. If you have a shade cover, this can be placed over the top of the mini greenhouse to provide an extra layer of insulation.

Seal up any gaps between panes or doors with weatherproof tape, as draughts are one of the main ways your greenhouse will lose heat. You may also want to seal up gaps in the bubble insulation to be sure that minimal cold air gets through to your plants.
Do remember that any layers of insulation you put on your greenhouse will cut out some of the sunlight which your plants need to grow.
Inside the greenhouse and on very cold nights, you could lay horticultural fleece over your plants, but remember to take it off during the day so that sunlight isn’t restricted. If you have any old polystyrene plant trays, place these under any plants that are on the floor, as this will keep the roots off the cold earth.
Heating Your Greenhouse
Insulating your mini greenhouse will slow down the loss of heat from the mini greenhouse, which is fine if the days are warmer and the frost is just overnight, but when it’s very cold some supplementary heat is needed to keep the greenhouse above freezing.
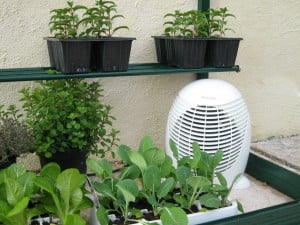
There are several options when it comes to providing some extra heat. If you have access to mains power in your greenhouse, electric heating is probably the easiest option, and also the safest for your plants.
The fan of an electric heater will move the warmed air around the greenhouse, reducing cold spots. It’s important to leave some space in front of the heater, otherwise delicate leaves can be damaged by the heat. It is also important to keep an eye on the compost and make sure the pots do not dry out too much – normally hand watering with a small watering can is best at this time of year.
For greenhouses without electricity, an alternative is paraffin heaters. A paraffin heater will keep a greenhouse under 8ft frost-free as long as the outside temperature doesn’t dip below -6C.
The modern paraffin grades run very cleanly and their main by products are CO2 and water vapour. CO2 is good for the plants, but it is important to ensure that the water vapour does not cause damp problems. Diseases will spread easily in humid and warm environments, so you need to keep a real eye on how you’re balancing humidity with heat in order to reduce the risk of mould. This can be done by ensuring your space is properly ventilated, or by using a dehumidification system.

It can get pricey using electric heating, but this can be controlled using a thermostat which sets the heater to only come on when the temperature dips below a certain level. Additionally, you should group the plants that need heat together to avoid spending energy heating space you don’t need to.
A thermometer with max and min temperatures will allow you to properly monitor the heat in your greenhouse – another way to ensure you’re not wasting energy. A wireless unit will allow you to have a sensor inside the greenhouse and the display inside the house – some heaters will also feature an alarm to warn you if the temperature drops too far.
Rather than all your plants, you may just need to give your seeds a constant temperature to ensure proper germination, which is where heated propagators come in really handy.
Heating Without Electricity
We’ve covered the option of using paraffin heaters, and, depending on its size, there are a few more ways of heating your greenhouse without electricity, too.
For larger greenhouses, you could provide a small temperature lift by having a composting heap of hay or straw, or by keeping containers of water in the space. For mini greenhouses, use glass bottles full of water. The idea is that they absorb the warmth during the day and then release it back during the night.
If you’re using a lean to greenhouse against a brick or concrete wall, this will act in a similar way and benefit from the heat lost from the supporting wall.
For more occasional frost protection duties, in addition to insulating your mini greenhouse, an 8 hour tea-light inside a terracotta pot makes a good heater. Invert another pot on top to make a chimney (make sure it has a drainage hole in it to act as a chimney). The candle will warm the pots, which will then radiate the heat out. If you are placing this on the glass middle staging put a saucer or insulated mat underneath the pot to protect the glass.
By following these tips, you can make sure that your greenhouse remains warm enough over winter. Why not get some more information on what to grow in a greenhouse in winter!
In additions, the RHS has a wealth of advice on greenhouse heating.
